We are a family of pancake junkies. Our favorite is the classic buttermilk pancake. Tinker Bell likes a few mini chocolate chips dropped on each pancake while baking, while the Goose likes blueberries. My Bubba loves to absolutely drown his pancakes, while I like mine with just a touch of syrup. But we also love banana pancakes. The great thing about this recipe is that you can substitute any type of flour you want and it doesn't change the result. One weekends I might feel indulgent and use all-purpose flour, but during the week (before school) I only use whole wheat or whole wheat pastry flours. The whole wheat helps to keep the munchkins bellies full until lunch.
1 cup flour (your choice)
1 1/2 T sugar
2 tsp baking powder
pinch of salt
1 egg, beaten
1 cup milk (any type)
2 T oil
2 ripe bananas, mashed
1 tsp vanilla
1-2 tsp cinnamon (add to your taste)
I usually use two small or medium bananas. If your bananas are particularly large, just use one or one and a half. Too much banana can make the pancake mushy and unpleasant. You want them very ripe, the darker the sweeter. I usually use a darker banana than the ones in the picture. Did you know that if you ripen a banana to just the way you like it and then stick it in the fridge it won't ripen any more for almost two weeks? The peeling will turn black immediately, but the banana itself stays perfect. Bananas ripen so quickly here in the Florida heat that this little tidbit has saved us money. (Did you know that chickens LOVE bananas? It's our girls favorite treat!)
I use my mixer to mash the bananas. I prefer the pancakes without banana lumps, but if you like them you can certainly leave big lumps and it won't hurt the finished pancake.
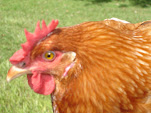
Add the beaten egg, milk, oil, and vanilla to the mashed bananas. This new Smart Balance oil is great stuff. A blend of canola, olive, and soy oils. (That's an Eragon egg. Such a sweet girl to help us out with our pancakes.)
This time around I used one cup of whole wheat pastry flour. It's a bit smoother than regular whole wheat. Add the flour of your choice, sugar, baking powder, salt, and cinnamon to the banana/milk mixture.
The batter will be slightly lumpy. Do not overmix! Pancakes get tough with too much mixing.
I use a 1/3 cup for each pancake. Lightly grease your griddle and bake the pancakes over medium high heat, about 350 if you have an electric griddle. When your pancakes just start to look done around the edges and the bubbles have begun to pop, flip them. (Only flip once.) After the flip I go ahead and butter them while they are still cooking. The butter melts right down into the pancake and ooooo baby!
Enjoy!
30 April 2009
29 April 2009
Sprinkles Strawberry Cupcakes
This week's found recipe is from Martha Stewart's website. I didn't try to make this recipe any healthier, sorry. It's been my experience that cupcake recipes do not like to be messed with. I made one minor substitution and doubled the recipe, but that was it. Now let me tell you about the taste...perfection. They were fluffy with a bit of heft, not-too-sweet, moist (even the next day), and even better without the frosting. I measure the success of a cupcake by how good they are without frosting. If they need it, the recipe needs tweaking. A cupcake should be able to stand alone and then the frosting is just an extra special treat.
I pureed enough strawberries in my mini food processor to make 2/3 cup. Half of that is for the cupcake batter and half for the frosting.
Your strawberries should look like this:
To the strawberries, add 1/4 whole milk (or heavy whipping cream, which is the only change I made) and one tsp of vanilla. Set that mixture aside.
Cream 1 stick of butter (Smart Balance stick) and 1 cup of sugar until light and fluffy. That is the secret to good cakes and cupcakes. You need to beat a lot of air into the butter/sugar combo.
It is also important to add the eggs one at a time, mixing well after each addition. The recipe calls for 1 large egg and 2 large egg whites. I put the 2 discarded yolks into a baggie and add them to the scrambled eggs in the morning. In a separate bowl, combine 1 1/2 cups all-purpose flour, 1 tsp baking powder, and a pinch of salt. Add half of the flour mix to the butter, sugar, eggs mix and beat just until combined.
Then add all of your strawberry, cream, and vanilla mix.
The last step is to add the rest of the flour. Be careful not to overbeat! Just until combined.
Line a 12-cup muffin tin with paper liners, fill, and bake at 350 for 22-25 minutes. I found that 23 minutes was perfect. If you overbake your cupcakes will be dry and sad.
The frosting is amazing, if unnecessary. I ran out of powdered sugar before I could give the frosting a fluffy texture and ended up with more of a glaze. But it was a darn good glaze!
3 squares white baking chocolate
2 T heavy cream
2 cups (more!!) powdered sugar
1/3 cup strawberry puree
3 T butter, melted
I melted the chocolate in a double boiler. Really just a metal bowl over a small saucepan. The water should not get hot enough to boil and should never touch the bottom of the bowl.
Add the rest of the ingredients to chocolate and beat, adding more cream or powdered sugar, until you get the consistency that you prefer. Thick is good. :)
You've fallen in love a little bit, haven't you? I can't blame you. The little guy tastes even better than it looks!
Labels:
baking,
butter,
buttercream,
cooking,
cream,
cupcakes,
eggs,
flour,
frosting,
martha stewart,
recipes,
sprinkles,
strawberries,
vanilla
Lemon Squares
After I got married my mom gave me a Better Homes and Gardens cookie cookbook. On the inside she inscribed, "have fun baking--be sure to clean up the flour!" I did a lot of baking as a kid/teenager and maybe, once, I got one tiny speck of flour on the counter top. But it was a tiny amount and just that once, right Mom? ;)
I love this cookbook. The first half is "All Day Treats" and then you flip it over and the other half of the book is "Christmastime Treats." This cookbook is well-used, spotty with recipe remains (and just a touch of flour), and marked up with alternate measurements and ingredients. The Lemon Bars recipe is the best I have ever tried.
Just look at that gooey lemon deliciousness! Makes your mouth water, doesn't it?
1/3 cup butter, softened (Smart Balance sticks)
1/4 cup powdered sugar
1 cup flour
2 eggs
3/4 cup sugar
2 tablespoons flour
2 tsp lemon zest (optional)
4 tablespoons lemon juice (use lemons, not the bottled juice stuff)
1/4 tsp baking powder
powdered sugar for dusting
For the crust, cream butter and sugar in mixer and add 1 cup of flour. Beat until mixture resembles crumbs. Just like a pie crust.
Press this mixture into an ungreased (because of all the butter) 8x8 inch baking pan and bake at 350 degrees for 15 minutes. You aren't looking for golden brown, so don't overbake.
That's the before baking photo. I forget to take the after, but it looks like that only puffy.
While the crust is baking, beat the eggs in the same mixer bowl until they are foamy.
Now add the 3/4 cup of sugar, 2 T of flour, lemon juice (I have started using real lemon juice-not from the bottle-and it makes the squares soooo much better), and baking powder. (If you are using unsalted butter you might want to add just a pinch of salt.) Beat on medium speed for 3 minutes, or until slightly thickened. Stir in the lemon zest and pour mixture over the partially baked, still hot crust.
Bake at 350 for 20-25 minutes or until lightly browned around the edges and the center is set. Be careful putting it into the oven...I slung it around a bit and had the lemon mixture slosh up the sides of the pan. So...it looks a lot browner around the edges than it should. :)
Cool in pan on a wire rack, dust with powdered sugar, and cut into squares. What? You have a crappy wire rack that sits directly on the counter and allows no airflow thereby defeating the purpose of the wire rack? I have a solution for you! A word of caution...kids find this hilarious. Don't know why.
Now, as Tinker Bell likes to say, time to feast!
That is not a fair representation of how many squares this recipe makes. Most of them never made it to the plate. The recipe claims it makes 20, but I have never counted. I've found it best not to count how many baked good I eat.
28 April 2009
Cheesy Chicken Enchiladas
This recipe is one of my family's favorites. I got it out of one of my many, many cookbooks and gave it a healthy version makeover.
4 cooked, boneless, skinless chicken breasts
1 cup fat free sour cream
1 can Campbell's Healthy Request Cream of Chicken Soup (it's 98% fat free)
1/3 cup finely chopped onion
1 small can chopped green chilis, drained
1 cup shredded extra sharp cheddar cheese (plus a little extra)
6 whole wheat tortillas
salsa
Start by shredding your chicken breasts. You can chop them, but shredded tastes better. I don't know why. Mix the chicken, sour cream, soup, onion, chilis, and cheese in a large bowl.
More on the cheese...you can use 2%, of course. Personally, I don't like the taste. I can definitely tell that it is not...well, real cheddar cheese. (I just had a discussion about this with a friend. She says she can't tell, but I can so I don't use it.) It doesn't melt right either. But I do use lowfat mozzarella.
Back to the recipe. Whole wheat tortillas are in a galaxy far, far away from white flour tortillas. They have a better texture, are healthier, and actually add flavor to your dishes. A nutty flavor with depth that white tortillas can only dream about.
Now here's the part where you can experiment. I put about three big spoonfuls of mix onto each tortilla and end up with 6 enchiladas in a 9x13 dish. You could also wrap these like a burrito so that no gooey goodness leaks out, but I just fold them over a couple of times. I like the ends open and bubbly.
I spray the 9x13 with a little cooking spray before adding the enchiladas. It helps with clean-up since the cheese does tend to leak a little. Bake at 350 degrees for 20 minutes, remove from oven and add a little more cheese on top, then bake for another 5 minutes.
These taste completely indulgent and are a great comfort food without all the guilt. Except for the cheese...so maybe a tiny bit of guilt. :) Serve them with a little salsa on the side or even some extra sour cream.
Labels:
baking,
cheddar cheese,
cooking,
cream of chicken soup,
enchiladas,
green chilis,
recipe,
salsa,
sour cream,
tortillas
25 April 2009
Sandcastles in the Sand
We played hooky yesterday and went to the beach. It was a perfectly beautiful Florida day. We ate ham sandwiches and seedless red grapes, but I didn't end up cooking or baking anything. :)
Labels:
baking,
beach,
cooking,
florida,
grapes,
sand,
sandcastles,
sandwiches
23 April 2009
Fun With Meatloaf
Growing up I hated meatloaf. But you're supposed to as kid, right? Like on The Christmas Story when Randy says, "Meatloaf, smeatloaf, double-beatloaf. I hate meatloaf." Recently I stumbled on an amazing food blog Bake Me More and saw an idea for making meatloaf fun for kids. You'll need to make some mashed potatoes for the fun part of this idea. But first, the meatloaf recipe:
2 lbs lean ground beef
1 large green pepper
1 large onion
1 egg
1 cup oats (quick or old-fashioned)
3/4 cup ketchup
I use two pounds of meat so that we will have leftovers, but if you want to use one pound of meat just use smaller veggies, 1 egg, 1/2 cup each of ketchup and oats. Also, you can substitute the ketchup with tomato sauce or even tomato soup. I'm allergic to tomatoes. One touch and I look like I have a chemical burn. Thankfully, all of the acids (or whatever tries to kill me when I touch or eat them) has been cooked away in ketchup.
Mix all the ingredients, except the meat, in a large bowl.
Add the meat and mix thoroughly. I use disposable gloves and mix with my hands. Or let Tinker Bell do it. She loves mixing meatloaf! Sometimes I press the meat into an 8x8 pan, other times a loaf pan. Last night I lined a 6-cup muffin tin with aluminum cupcake liners and pressed a spoonful of meatloaf mixture into each one. I put the rest of the meatloaf into a loaf pan. I like to spread a little more ketchup on the top of the meatloaf. It gives it a nice crust and a prettier color than grey cooked meat.
After baking at 400 degrees for 60 minutes for the loaf and 30 minutes for the cupcakes, allow the meatloaf to sit for 10 minutes. If you use lean ground beef the moisture you see in the pan after baking won't contain much fat. I made the mistake once of draining the moisture immediately and the meatloaf was dry, dry, dry.
Now for the fun! Eyeball enough mashed potatoes to cover the 6 meatloaf "cupcakes" and put the potatoes into a small bowl. Add two drops of liquid food coloring, any color, and mix. Then frost your cupcakes! Bake Me More got creative and used a pastry bag and made the prettiest meatloaf cupcakes. I just spread the potatoes like frosting. Either way the kiddies will be tickled with their meal.
Even my picky eater ate her meatloaf!
22 April 2009
Banana Oat Chocolate Chip Muffins
I made these muffins this morning for the girls before school. I did not take step-by-step pictures because a.) my camera was under the impression that its batteries were low and b.) it was 5am. I did not feel like fooling with a camera that would take one picture and then shut off. We're out of batteries and it was too early for me to think of stealing the batteries from a remote. I did that this afternoon. I can't tell you how much my husband loves to pick up a remote and find that it has no batteries in it. :)
Banana Oat Muffins
1/2 cup all-purpose flour
1 cup whole wheat flour
1 cup oats
1/2 cup brown sugar (or 1/3 cup honey)
2 tsp baking powder
1 tsp baking soda
1 egg
3/4 cup milk (I used skim)
1/3 cup unsweetened applesauce
1/2 tsp vanilla
1 cup mashed bananas (about 3 bananas)
1/4 cup mini chocolate chips
Did I mention that these are healthy muffins? As healthy as a muffin can be, anyway. The whole wheat flour and applesauce instead of oil makes me feel less guilty about adding the chocolate chips.
Combine the flours, oats, sugar, baking powder, and baking soda in a small bowl and set aside. In a large bowl (or mixer) lightly beat the egg and then stir in the milk, applesauce, and vanilla. Add the bananas and mix thoroughly. Stir the flour mixture into the banana mixture and stir until just combined. Pour batter into a 12-cup paper lined muffin tin and bake at 400 degrees for 18-20 minutes.
These muffins were so tender and moist. Really the only way you could tell that they had whole wheat instead of all white flour was by the way they stuck with you until lunch. Big hit with the munchkins and hubby.
I also liked that they were quick and easy enough to have ready by breakfast time, without having to get up earlier than usual.
Labels:
baking,
banana,
chocolate chips,
muffins,
oats,
recipes,
whole wheat flour
20 April 2009
Paula Deen's Buttermilk Biscuits
There is nothing healthy about this biscuit, but there is no better biscuit recipe on the planet. I write that with a heavy heart because growing up my Georgia born and raised Southern grandmother lived with us and she made buttermilk biscuits every single day. And they were so good. I could cry just thinking about them. But, no matter how many times I made them with her or how many times she walked me through the process, I cannot make her recipe work for me. I don't know what it is! She just had the touch. It breaks my heart that she is not around to make them for us any more. She just used flour, baking powder, Crisco, and buttermilk and they would rise and be absolutely beautiful. When I make them they come out like pancakes. (She would cut them open while they were hot and add extra-sharp cheddar cheese slices. Mmmmmmmm.)
Paula Deen's recipe calls for yeast and the biscuits puff up and are just as tender and moist as they can be. I do, however, add one step that my grandmother never forgot and that takes these biscuits over the top. But first, the ingredients:
1 package yeast
1/2 cup lukewarm water
5 cups all-purpose flour
1 teaspoon baking soda
1/2 teaspoon salt
1 tablespoon baking powder
2 tablespoons sugar
3/4 cup Crisco
2 cups buttermilk
Mix the 1/2 cup of water to the yeast and add just a pinch of sugar, which feeds the yeast (or as Tinker Bell says, "the little burpy guys"). Set aside. Meanwhile, pour your two cups of buttermilk into a bowl to let it lose some of its refrigerated cool.
Use a pastry cutter (or two knives) to cut the shortening into the flour, baking soda, baking powder, sugar, and salt. It will start out like this:
And end up looking like this:
When your yeast has proofed (about 5 minutes), add it to the buttermilk and stir.
Add the buttermilk mixture to the flour mixture and stir until just barely combined. The longer you mix it the tougher your biscuit will be. You want tender, soft biscuits, so barely mix! Then turn it out onto a lightly floured surface and roll to your desired thickness. I like them big and fluffy, so I don't pat it out too much and am only able to cut about 7 biscuits before having to reroll. If you flatten the dough you will have flat biscuits. Then you'll think I was lying to you about how much these biscuits puff. :) I use a large cup, not a biscuit cutter.
Place your biscuits (about 12 with leftover dough) onto a greased cookie sheet. Now here is my grandmother's secret touch...rub each biscuit top with buttermilk. Instead of a flat, dull biscuit top you will have a glossy, slightly crisp top.
Paula suggests baking them at 400 degrees for 12 minutes, but my biscuits always require about 15-16 minutes. Aren't they pretty?!!
Serve them with cheddar cheese slices, butter, jam, honey, gravy, or (our family favorite) bacon, egg, and cheese.
Labels:
biscuits,
buttermilk,
cheddar cheese,
Crisco,
Georgia,
pastry cutter,
paula dean,
paula deen,
yeast
Subscribe to:
Posts (Atom)