29 July 2009

Whole Wheat Dinner Rolls

I love that this recipe uses whole wheat, but still tastes light and tender like a white bread roll. And is there anything better than a dinner roll? Okay, cake, but bread is awesome. Goose and I tease all the time that we could live on bread and water and be perfectly happy. From the time you put the yeast in the water to sit until the rolls come out of the oven is about a two and a half hour process. Not a quick bread, but totally worth it.

You will need:

1 cup less 2T warm water
1 package yeast
1/4 cup sugar
1/2 tsp salt
1T butter, melted
1 egg
1 cup plus 2T whole wheat flour
1 1/4 cup all-purpose flour
*****************
2T melted butter


Dissolve yeast in the warm water with a tsp of the sugar. Let stand for 10 minutes or until creamy.


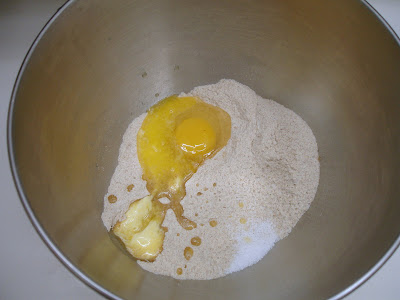
Mix together the rest of the sugar, salt, the 1T of melted butter, egg, and whole wheat flour in your mixer bowl. (Use the dough attachment.) Add the yeast mixture and mix.


Add the white flour 1/2 cup at a time until the dough pulls away from the sides of the bowl. At this point you can turn out the dough onto a lightly floured surface and knead for 8 minutes or keep it in the mixer and mix at a medium speed for about 6 minutes. Watch it and periodically pull the dough off of the dough hook.


Form the dough into a ball...


Take the dough out of the bowl, oil the bowl lightly, and then put the dough back into it, turning lightly to coat. Cover with a damp cloth and let it rise in a warm place until doubled, about 1 hour.


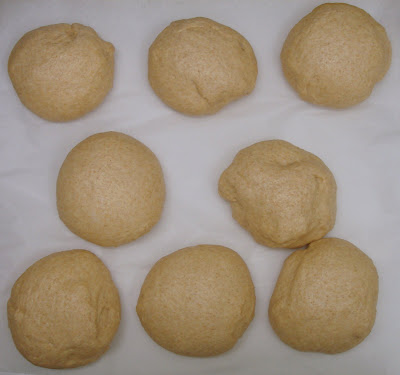
Punch down the dough, cover, and let it rise until doubled again, about 30 minutes. Punch it down again and divide the dough into 8 large balls. Put the balls onto a lightly greased parchment covered cookie sheet.


Let rise, uncovered, in a warm place for 40 minutes or until doubled.


Bake at 400 degrees for 12 minutes or until golden brown. Remove from oven and brush with the melted 2T of butter.


Oh, man. I have to make these again soon! It is worth turning on the oven in this suffocating heat for these babies. They taste even better than they look, too. Okay, one more picture.


Enjoy!

28 July 2009

London Broil

London Broil has a reputation for being a tough cut of meat, but it can be as tender as an expensive steak. Add that to it being super inexpensive and you have the makings of an impressive, flavorful meal. You will need to grill it, though. I don't have any idea how to bake it to get the same results. To get it really tender you also need to plan it a couple of days before. But we are talking less than $10 to feed a family of four. As anyone who has to watch their budget knows, meat is expensive. London Broil is the perfect choice when you want to feel like you are splurging on a decadent meal, but are feeling the pinch of the economy.

You will need:

one London Broil (Top Round Roast)
Italian dressing (I highly recommend Good Seasons mix)
plastic bag


Since I keep mentioning my preference for Good Seasons Italian dressing I figured I should post some pictures of how easy it is to make.

You will need:

Good Seasons Italian dressing envelope (about $2 for 2)
1/4 cup vinegar (white or apple cider)
3 T water
1/2 cup oil (your choice)


Mix the vinegar and water in a bowl or bag. I think the recipe actually calls for apple cider vinegar, but I used white. (I had just made BBQ sauce and used up all my cider vinegar. I buy white in monster bottles for $1 and put it in everything. I put a T in pots that I am soaking, 2 T in the laundry and it whitens better than Oxy Clean, and it is indispensable for cleaning the coffee pot.) Add the envelope of seasoning.


Mix thoroughly.


Now add the oil and mix.


Pour over whatever you want to marinade or use in salads. It's fantastic!! It also comes with two in a box with a cruet. The bottle actually has lines for the vinegar, water, and oil, no measuring. I have about six cruets, but use them for other things. (homemade vanilla, cinnamon, taco seasoning that was bought in bulk, etc.)


Now here comes the prep time--you will need to marinate this guy for two days. Yep, two. You can grill it after one and it will be tasty and delicious, but give it the full two days and you won't be sorry. So tender, so juicy. You'll think you are dining in the finest of restaurants with expensive meat. Trust me. (Flip the bag a couple of times a day to keep the marinade evenly covered over the meat.)


Grill your London Broil on medium heat (away from the direct heat) for 7 minutes per side, 5-6 minutes if you have a thin cut, 8 minutes if you like less pink in your meat.


Let it sit for a full 15 minutes. If you cut into it before that you will lose all of your great juices and end up with dry meat. That's a hard and fast rule that applies to all meat. Leave it alone and let it rest for 15 minutes.


The last, but very important part of having London Broil is cutting it on the diagonal against the grain. This step makes the London Broil super tender. It can be unchewable if you don't cut on the diagonal. Turn your steak at a 45 degree angle and slice thinly.


Don't be surprised if you family groans in pleasure at the flavor of this meal. Pretend you spent a ton of money on the cut of meat, exaggerate how long it took to prepare, and give your self a pat on the back for being cheap and easy...wait, that didn't sound right! The meal is cheap and easy, not you. Buy yourself a little something for spoiling your family on a budget! :)


Enjoy!

24 July 2009

Healthier Banana Bread

Bananas ripen so quickly here in Florida. We seem to get only three days before I have to put them in the fridge to stop them from ripening further. And then a lot of times we forget about them. I blame my fridge--I hate it and complain about it daily. It's one of those horrid side-by-side things, but it was brand spanking new when we moved into this house 5 years ago and I can't justify replacing it just because it has space issues. The side-by-side fridges are deep but narrow making it impossible to find anything because everything is shoved to the back and covered by what's in front. So I end up buying doubles and triples of products and...I could go on and on. I. Hate. My. Fridge. But I love banana bread, which I make often because, well, see above. I've tried to healthy-up the recipe since we eat so much of it.

You will need:

1/2 cup whole wheat flour
1 1/2 cups white flour
1 tsp baking soda
1/4 tsp salt
1/2 cup butter (Smart Balance!!)
1/4 cup unsweetened applesauce
3/4 cup brown sugar
2 eggs (or egg substitute)
4 overripe bananas
cinnamon (to taste)
one loaf pan


In a small bowl, combine flours, baking soda, and salt--set aside. In a large bowl, mash the bananas. I use my Kitchen Aid stand mixer with the paddle attachment. Add butter and applesauce and mix together. (I made this recipe with cinnamon applesauce once because we were out of unsweetened and it was really good, so any applesauce will do.)


Add sugar and cinnamon, mix, then add eggs one at a time. I don't measure cinnamon in my recipes, I just shake it out until it looks right. Add to your taste, but I suggest about a tsp or so.


Now gently add your flours and stir. You can use a spatula or wooden spoon for this step if you are worried about overmixing. Stir until just combined--you don't want your bread to be tough.


Pour the batter into a greased loaf pan and bake at 350 for 55-60 minutes or until center is baked.


If you are worried that your oven temperature is not accurate then bake this bread at 325 until the center is baked. A common complaint about quick breads is that the centers are still raw while the sides are overdone, which is most often caused by an oven that is too hot. If it happens, you can tent some foil over the top until the center is done. Another cause of a raw middle is a pan that is too small. Make sure your loaf pan is large enough--if you are unsure, make 2! A crack down the middle of the bread is perfectly normal.


Let cool for 10 minutes in pan on a wire rack and then turn out.


Banana bread is better is wrapped overnight and eaten the next day. But who does that?? We love our banana bread hot from the oven and smothered in butter.


To add a punch of extra flavor try adding 1 tsp of banana extract. I do that sometimes (when I'm not out of extract). I love it with or without!


One final note: the more whole wheat you use, the drier the bread. White flour keeps bread moist and tender. If you insist on using all whole wheat, up your fat in the recipe (at least 2 more T butter). Your bread will be denser and much less tender, but still tasty!

Enjoy!!

my recipe card:

Banana Bread

See Banana Bread on Key Ingredient.

22 July 2009

Good for Anything Sauce

This sauce recipe is perfect for beef, chicken, or fish--but fish is my favorite. It is reminiscent of T.G.I.Friday's Jack Daniels Grilling Sauce. Chock full of flavor and you don't have to mess around with marinating anything. This sauce is a topper!

You will need:

3/4 cup honey
1/3 cup soy sauce
1/4 cup brown sugar (dark is preferable, but light is fine)
1/4 cup pineapple juice
2 T lemon juice
2 T white vinegar
2 tsp oil
1/2 tsp cayenne pepper (optional)
1/2 tsp paprika
1/4 tsp garlic powder
salt and pepper to taste (I add a few shakes of each)


This recipe makes quite a bit of sauce. I get three full uses out of it, half it if you only want to use it once. It keeps in the fridge, covered, for two weeks.

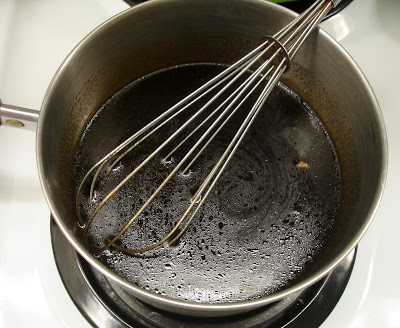
To make the sauce, combine all ingredients in a saucepan over medium/low heat and whisk.


Bring to a rolling boil then reduce the heat to a simmer/slow boil.


Boil and reduce for 15-20 minutes or until syrupy. (Watch the sauce closely to be sure it doesn't bubble over.) Remove from heat and pour into a bowl to cool a bit.


For fish--I rub each fillet with a bit of oil and Montreal Steak seasoning and put into a skillet on medium/high heat. Drizzle with sauce...


and cook for 4 minutes on each side, drizzle with more sauce after flipping.


Then, if you want to take a picture, remember to do so before eating it down to the last two bites. :)


Enjoy on grilled (or baked) beef or chicken as a finishing sauce. I usually just put plastic wrap over the sauce and store in the fridge and then use it up in a few days. To store it longer, put it in a sealed plastic container or bag.

19 July 2009

The Best Apple Pie Ever!

Apple pie is my least favorite pie. Un-American, I know. I love apples, love brown sugar, love cinnamon, love pie, don't like them mixed together. I don't even like the smell of apples and cinnamon. Weird, I know. But, this recipe I like. Not love, but like and based on my tolerance and my family's adoration for this pie I figure it must be the best darn apple pie ever.
You will need:

1/2 to 1 cup flour
6-7 cups Granny Smith apples
1 cup sugar
1 cup brown sugar
2 T butter
1 tsp cinnamon (I use more...lots more.)
2 pie crusts
1 pie pan
cinnamon sugar


One apple equals about one cup, so I used 6 apples. If you get your hands on some tiny Granny Smiths you might need closer to 8. I used my handy dandy apple peeler (it also cores and slices). I love it and wish I loved to bake with apples more so I could use it more often.


The peels were so pretty I just had to take a picture.


Mix the flour, sugars, and cinnamon in a large bowl. I used 3/4 of a cup of flour. Finding the right amount of flour is tricky...it all depends on the juiciness of your apples. Unfortunately, you usually can't tell how much liquid they will give up until they are baked. It's a crap shoot--you could end up with an overly-juicy pie or one that is too thick and can stand on its own. Those pie slices that are thick and stand up high are beautiful in magazines, but they don't taste so great in real life. I have found that 1/2 cup is almost always too little, though.


I like to chop my apples instead of slicing them. With the slices you have to cut up your pie and I don't like that. I just want to dig in and get a forkful. The large chops cook all the way through, I promise.


Now add your apples to your flour, sugar, cinnamon mix and get in there with your hands to mix. Kids love to help out with this part!


Line your pie plate with one crust. I just use the refrigerated ones. Easy and super yummy. Add all of the covered apples to the pie pan. You will have lots of the mix leftover--just pour it over the apples.


Cut up the 2T of butter and place around the top of the pie.


Now here's a trick. I use mini cookie cutters to cut out shapes from the top crust. This trick allows more steam to evaporate from the pie and caramelizes the sugars inside. SO GOOD! (Save your cutout shapes.)


Place the top crust on top of your pie and seal the edges. Now brush the entire top crust with milk and place your cutout shapes anywhere you like, except over the openings. Now brush the tops of the cutouts with milk and sprinkle cinnamon sugar over the top of the whole pie.


Bake at 375 degrees for 45-55 minutes. I use a cake tester to poke the apples and make sure they are soft. I've never had to bake for more than 55 minutes.


This pie speaks for itself, don't you think?


Enjoy!

**note: I baked this pie a few months ago. I'm still not turning on my oven in this heat and I am really, really looking forward to the big cool down in September (if we are lucky) or October. Definitely cooler by November. Or December. I'm having trouble remembering when it was cool... :)