Showing posts with label cocoa. Show all posts

11 May 2010

Slow Cooker Chocolate Cake

I have to apologize right off the bat for this recipe. You definitely should not make it...because it will ruin chocolate cake for you forever! IT'S THAT GOOD. Beyond good, insanely awesome, ridiculously delicious. Chocolate cake made any other way will seem plain, unexciting, tasteless, and cold. This recipe is very easy to make and the result is out of this world. You don't even have to turn on your oven--a big bonus for those of us who have had to turn on our air conditioning already this year. And you eat it while it's still hot so it's also perfect for people, like my Montana family, who need something to warm them up since their Spring weather has not started yet.

You will need:

slow cooker
1 cup all-purpose flour
2 tsp baking powder
6T butter
2 oz (1/4c) semi-sweet chocolate chips
2/3 cup white sugar
3T Dutch-processed cocoa
1T vanilla
1/4 tsp salt
1/3 cup milk
1 egg yolk
***************
1/3 cup brown sugar
1/3 cup white sugar
1/3 cup Dutch-processed cocoa
1 1/2 cups hot water
****************
2 paper towels


A word on the cocoa--in this recipe you really need to use the Dutch-processed. In my grocery store it's sold right alongside the unsweetened cocoa. Hershey's Special Dark is what I use and it's perfect. Dutch-processed cocoa has been treated to neutralize the acids in cocoa and is used in baked goods that call for baking powder, like this one. If you use regular unsweetened cocoa you will end up with a slightly bitter tasting cake. It's the same price as regular cocoa.


Mix together the flour and baking powder and set aside. In a medium-sized pot melt the butter and then add the chocolate chips. Stir until melted and combined and then remove from heat. (I melt the butter first because adding cold butter to chocolate can cause it to seize. That's happened to me many, many times.)


Whisk in the 2/3 cup sugar and 3T Dutch cocoa.


Now whisk in the vanilla, salt, milk, and egg yolk. Combine thoroughly.


Whisk in the flour/baking powder mix.


Pour the batter into a greased slow cooker. I used 2T of butter and rubbed it on the bottom and halfway up the sides of my Crock Pot. You can use pan spray if you like--just make sure it is greased well.


In a medium-sized bowl whisk together the brown sugar, sugar, and cocoa.


Slowly pour in the hot water (I nuked the water in the microwave for one minute) and whisk until smooth.


Pour into the slow cooker on top of the cake batter. DO NOT STIR.


Place two paper towels (do not rip apart) across the top of the slow cooker and put on the top. The towels will keep the condensation from dripping onto your cake.


Turn the slow cooker on HIGH and leave it alone for 1 hour and 15 minutes. The cake is done when it is set and pulls away slightly from the sides of the slow cooker. Turn off the cooker, take off the top, and lift out the removable bowl. Set it aside on a hot pad and leave the cake alone for 25 minutes. It will hard not to sample, but resist!


Heaven. On. Earth. You'll never see chocolate cake the same way again. The top of the cake is moist, chocolaty, and amazing, but the bottom is fudge sauce. Fudge sauce! (My pictures came out a bit unfocused. Maybe my hands were shaking in anticipation!)


There really aren't adequate words to describe how divine this cake tastes. There were no leftovers. I asked Bubba and the girls how it tasted and I got a bunch of grunts and "mmmmmmmm's." :) No need for ice cream with this cake!!


After she finished eating Goose said, "Wow. That's the most awesome cake ever."
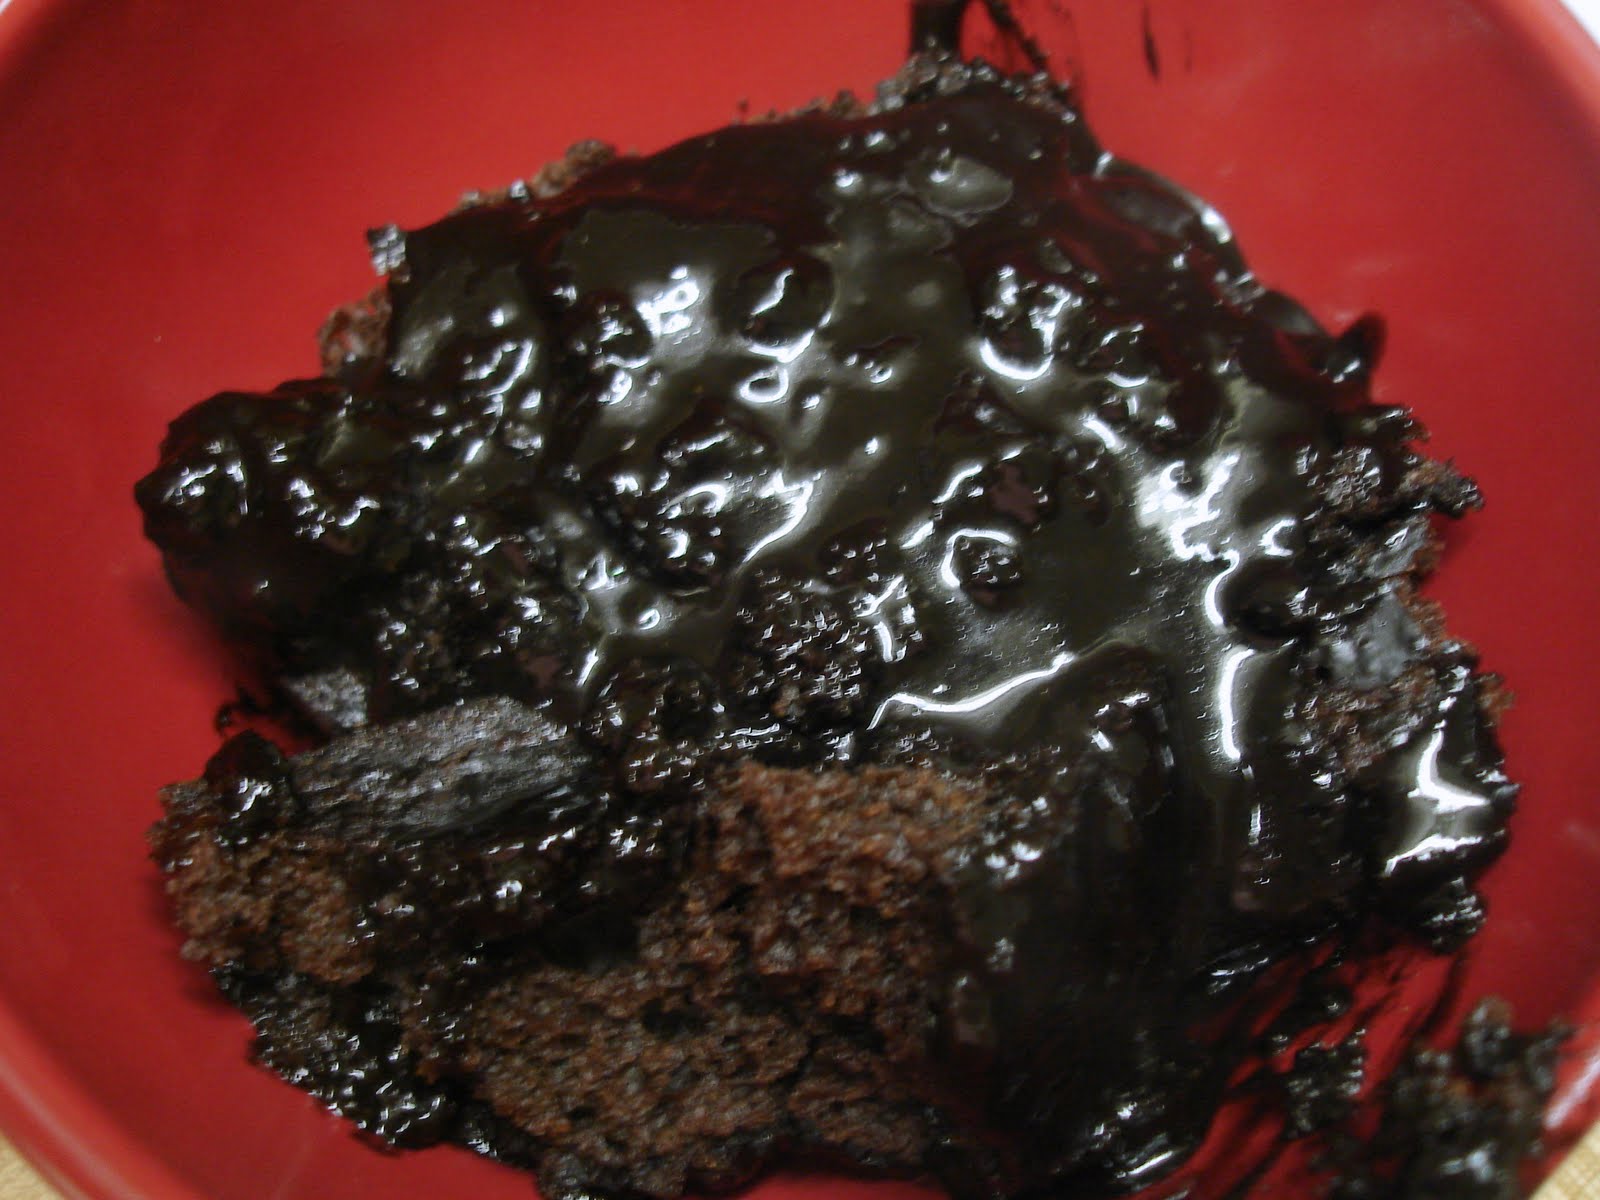


Enjoy!!


Slow Cooker Chocolate Cake

See Slow Cooker Chocolate Cake on Key Ingredient.

20 September 2009

Soft Chocolate Cookies

Sunshine Mom is feeling great (after beating H1N1) and could not stay in bed for one more second. I promised brownies, but was out of unsweetened chocolate so I made cookies instead. These cookies are my kids absolute favorites. Even Tink, my low-tolerance-for-sweets eater, ate four of these cookies at one time. In fact, although I still have some oatmeal cookies in the freezer, the soft chocolate ones are gone. These cookies stay fresh for days because they are so soft and moist.

You will need:

1 cup Smart Balance (melted, but not hot)
1 1/2 cups sugar
2 eggs
2 tsp vanilla
2 cups flour (I used white whole wheat)
2/3 cup cocoa (I used Hershey's Dark)
3/4 tsp baking soda
1/4 tsp salt


Add the sugar to a large mixer bowl and pour the melted (but not hot) butter on top. Mix together until it lightens, but before it gets fluffy.


Add eggs, one at a time mixing after each addition.


Then add the vanilla.


In another large bowl, mix together the flour, cocoa, baking soda, and salt.


You can size these cookies any way you like them. I use a large soup spoon and make a big ball with the dough. They aren't perfect. My cookies never look like they were made in a factory. Imperfect and definitely homemade, and that's the way I like them! If you want a more polished look, refrigerate the dough for an hour and then make perfect 1-inch balls. You don't need to flatten them with a fork.


Bake at 325 degrees for 10 minutes. (If you don't line your cookie sheet with parchment, give it a very light greasing with cookie spray.) Take them out when they still look slightly underdone in the middle. They need to set five minutes on the cookie sheet before removing to a wire rack. They seem like they will fall apart, but when they are completely cool and they stay together perfectly.


Melt in your mouth!! Super soft (but still holding together). After the first day I store them in a freezer bag in the freezer. I'm sure they would last a month in there, but we are lucky to make it three days.


Enjoy!

07 September 2009

Eggless Chocolate Cake

If ever there was a person who loved eggs in all their beautiful forms, that person is my mother-in-law. Unfortunately, she has developed an allergy to them making it difficult for her to enjoy life's many baked goods...not to mention ruining her breakfasts. :) We are going to visit her and my father-in-law (and two sisters-in-law YAY!) for xmas this year. She and I share December birthdays and I wanted to make her a birthday cake while we were there. The egg allergy throws a distinctive wrench into that plan, though. So I thought I would try out a few eggless cake recipes until I found one that would do her birthday justice. The first one I tried is a chocolate cake with a bunch of my own changes to pump up the flavor and add more heft to the cake. Eggless cakes have a tendency to fall flat. (I also halved this recipe since the original called for a whole lot of flour and I was not sure if we would even end up liking it. Can't be wasting my King Arthur!) So, with no further ado...

You will need:

2 1/4 cups all-purpose King Arthur flour
1 1/2 cups white sugar (I only had one cup and had to substitute the half cup with brown sugar)
1/2 cup cocoa (I used Hershey's Dark)
1.5 tsp baking soda
1/4 tsp salt
1/2 cup oil
1 1/2 cups room temperature coffee (the original recipe calls for water, but...boring!)
1/5 tsp vanilla
***my additions:
1 tsp white vinegar
1/4 cup mini semi-sweet chocolate chips


I have to apologize for the ugly, hideous counter tops. They were there when we moved in and everything else was so perfect...I feel the need to apologize all the time about them! We redid the cabinets (which were a hideous dark brown fake wood) but have yet to get to the counter tops. I have been using white posterboard for pictures, but sadly, it had an accident and had to be thrown away. One day we will replace them and I can stop whining. My husband will be pleased.


I buy my white vinegar by the gallon. It's good for cleaning, better than Oxy-Clean in the washing machine, removes hard water stains on dishes, etc. (We have well water and hard water stains are a concern.)


Add the flour, cocoa, baking soda, and salt to a mixer and stir to combine. The recipe calls for sifting, but I don't sift.


Now add your sugar. (See those little clumps of cocoa? Probably should have sifted.) Mix.


Make a well in the center of your dry ingredients and add the oil, coffee, vanilla, and vinegar.


Mix thoroughly, scraping sides, only until combined. Do not overmix. Now gently stir in your chocolate chips.


Butter and flour an 8-inch square (or round) baking pan. I would recommend using a metal pan--they are definitely better for evenly baking cakes. I used a glass pan so that you could better see the results.


Pour your cake batter into the pan and bake at 350 degrees for 45 minutes. The batter smelled chocolaty and was a beautiful dark brown.


It came out of the oven puffed up and shiny. Perfect!


That puffiness is why I added the vinegar. The recipe called didn't call for eggs or baking powder and it made me nervous. Anyone who has ever made a volcano (or Red Velvet Cake) knows the power of baking soda mixed with vinegar.


After cooling for ten minutes, I turned out the cake onto a plate. One of my red xmas plates that we only use on Thanksgiving or xmas...or when I want a cake to look pretty. Red is also my mother-in-laws favorite color.


I really wanted the flavor of the cake to stand out and not be overwhelmed by frosting or ganache so I whipped up a bit of chocolate icing. Just powdered sugar mixed with a little cocoa and milk. You can make as much or as little as you like. If I end up choosing this eggless cake to make for my mother-in-law I will cover it in chocolate ganache. (I didn't exactly measure the icing ingredients, but I used two heaping 1/2 cups of powdered sugar, about 1/4 cup of cocoa, 1/2 tsp vanilla, and enough milk to make it runny.)


Cool cake completely before icing.


The verdict? This cake was really rich with an incredible deep chocolate taste. It was also surprisingly moist. I thought it would turn out dry and flat, but it was a damn near perfect chocolate cake! I will definitely make it again. Oh, and without eggs in it you can sample the batter all you want. :)


Both monkeys said that the cake was "awesome" and ate two pieces each.


Enjoy!!

26 May 2009

Whoopie Pies

Have you heard? The whoopie pie is the new cupcake. Whether or not that is true, whoopie pies are making a comeback. The story of their origin depends largely on the storyteller's heritage. Was it the Pennsylvania Dutch who carried the little pies in their lunchboxes while working the fields and would "whoop" with delight at the treat? Or did they originate in the South where cooks would make them to keep children out of the kitchen, like hush puppies created to keep dogs quiet? Anyone familiar with my blog knows which side I back. :) I scoured the internet for a cream filling that did not include shortening and found this one.


Personally, I'll take a whoopie pie over a cupcake any day and this recipe is the best I have found. In fact, it is so perfect that I will stop trying out other recipes and use it exclusively. When Tinker Bell took a bite she said, "there are no words for how good this is." I agree!! Then she said, "you're pretty good at this baking stuff." Aw, shucks.

But the best part of this recipe is that the little pies are even better the next day. They should be wrapped in plastic wrap and stored in the fridge, but allow them to come to room temperature before eating.

For the cakes:
2 cups flour
1/2 cup Dutch-process cocoa powder (it has a stronger, deeper flavor than regular cocoa)
1 1/4 tsp baking soda
1 tsp salt (I used less, about 1/2 tsp)
1 cup buttermilk
1 tsp vanilla
1 stick butter, softened (I used Smart Balance 50/50)
1 cup brown sugar
1 egg


For the filling:
1 stick butter (again, I used Smart Balance)
1 1/4 cups powdered sugar
1 cup Marshmallow Fluff
1 tsp vanilla


Combine the flour, cocoa, baking soda, and salt in a bowl and set aside. Combine buttermilk and vanilla in another, small bowl and set that aside. Beat the butter and sugar together in mixer on medium speed until fluffy, about 3 minutes. Add the egg and beat until combined.


With mixer on low, alternate adding the flour mix and buttermilk mix, beating after each addition. Begin and end with the flour mixture. Grease or line with parchment at least two cookie sheets. I used two large and one small and greased them with cooking spray--I was out of parchment paper. The original recipe calls for using a 1/4 measuring cup, but I just used a large soup spoon and got 24 cookies total, which makes a dozen whoopie pies. Using a 1/4 cup with give you 9 pies total.


They are not exactly round and perfect, are they? It won't matter when you eat them!

Bake at 325 for 13 minutes, let set on the cookie sheets for 2 minutes, then transfer to a rack to cool.


While they are cooling (and they do need to be completely cool before frosting), beat together the butter, sugar, marshmallow, and vanilla on medium speed until smooth. About 3 minutes or so.


I turned over 12 of the 24 cookies and evenly distributed the unbelievably delicious filling amongst them, then topped them with the remaining cookies.


We couldn't wait until the next day and ate, well, most of the pies right after they were made. I stacked the leftovers on a plate, covered them in plastic wrap and put them in the fridge. The next day...oh, wow. Perfection.