Showing posts with label buttermilk. Show all posts

02 February 2011

Chicken Pot Pie with Sweet Potato Biscuit

We have been working on the 3 types of mixing methods for quick breads in my Baking and Pastry class for the past 4 weeks. We spent two weeks on biscuits alone. There were a few people who really struggled with biscuits. It's pretty easy to build up gluten if you overmix/overwork your dough. But my grandma (who lived with us) was Southern and she made buttermilk biscuits virtually every day of my life. I could make biscuits in my sleep. Not that I didn't learn anything or was bored in class, though! The chef showed us a technique for gathering the dough after all the ingredients are introduced that I have found to work very, very well. Plus, I have so enjoyed learning about the science behind why gluten forms and why the different ingredients work they way they do. Have I mentioned yet I LOVE culinary school?!! :)
  This recipe for Chicken Pot Pie with Sweet Potato Biscuit is an amalgamation of a couple of my recipes that I have not posted yet. What is so great about it (besides the AMAZING biscuits) is that you could easily leave out the chicken and double up on the vegetables. (But that won't make it a vegetarian dish because I use chicken broth in the gravy.) Or you could use entirely different veg. Parsnips instead of potatoes, broccoli, sweet potatoes IN the pie, and you could even add the peas that are supposed to go in this recipe but I totally forgot to include. :)

You will need for the sweet potato biscuits:

2 cups AP flour
1 T baking powder
1/2 tsp baking soda
1/2 tsp salt
5 T butter or shortening (I used Smart Balance sticks--not from the tub)
1 cup buttermilk
1/2 cup cooked, cooled, and mashed sweet potatoes
1 T honey
1 egg (to be used later as a wash)

Mise en place:


******************************
You will need for the pot pie:

1 cup chopped onions
1 cup chopped carrots
1 cup chopped potatoes
1 cup frozen peas
4 T olive oil
2 cups cooked, shredded (or cubed) chicken
3+ cups chicken broth (more on this later)
1 cup milk
3 tsp garlic
6T butter and 6T flour (for the roux)
*****************************

The first thing you should do when making this recipe is preheat your oven to 375°. Then chop your veggies (except for the peas--you won't add those until you are putting together the pie and adding the gravy). You can use a deep dish pie plate, but I just used an 8-inch square baking dish. Toss the veggies in the dish with the 4T of olive oil and salt and pepper to taste. Roast them in the oven for 30-45 minutes, taking them out and stirring them every 10 minutes. They will be tender and browned when done. 
   While they are happily roasting away, start your biscuits. Sift together the dry ingredients (or if you are using pre-sifted flour, just whisk them together).


In a small, separate bowl, mix together the sweet potato, buttermilk, and honey. This will keep the sweet potato from clumping and make it easier to add to the flour mixture later. Set it aside.


With the biscuit method, you add all the dry ingredients, cut in the fat, and then add the liquid ingredients. That's it! So now you have to "cut in" the butter. Make sure the butter is cold, not warm, not at all softened. Cube the butter and toss it into the flour mix. Now, if you were to just start cutting it in with a pastry cutter, etc. there would be no point to the cubing. You wind up with a lump of butter. SO, toss the butter cubes in the flour to coat each one and make sure it keeps its hands to itself and away from its buddies.


Now for the new techniques I learned in class. My grandma always used a fork or pastry cutter (in the later years) to cut in the butter, but my pastry chef showed us a method that works amazingly well. Unfortunately, it's easier to show and explain in person, but I'll give it a shot here. :)  Pick up a bit of flour and a cube of butter in one hand and smoosh the flour across the butter cube. Don't push the flour into the cube, but flatten the cube a bit while rubbing the flour across it. Make sense?


Do this with every cube, working quickly so that you don't heat the butter too much. Keep doing this with the cubes until they are all broken up. (You can grab more than one as you go along, of course.) Once the butter/flour has formed large crumbs, starting rubbing it together between your hands. Pretend you are a bad guy in a cartoon and are rubbing your hands together in glee because a you just got one over on Batman...or someone. :) 


Okay, now that your mind if full of thoughts about Christian Bale as Batman...whoo boy...you will have a mix that looks like this:


Now make a well in the center of your dry ingredients and add the sweet potato/buttermilk/honey mixture. About the buttermilk...it makes a HUGE difference. My Bubba doesn't even like biscuits without buttermilk now.


Here's another chef technique: use a fork to toss together the two mixtures. Sweep the leg fork along the sides of the bowl, tossing the dry into the wet and gradually folding/mixing lightly.


When it has barely come together, use your hands to knead it until just combined. Overmixing = gluten! Don't do it! Fold the biscuit dough over itself a few times and then STOP. Cover it with plastic wrap and chuck it into the fridge until you need it. (OR. Stick it in the fridge for 20 minutes, then take it out, roll it out lightly on a lightly floured surface and cut into biscuits. Brush with egg was and bake for 10 minutes.)


While the dough is chilling, start making the roux for the gravy. Melt the 6T of butter in a pan and then add the garlic. Saute for 2 minutes and then add the flour. If you are using a light butter or Smart Balance (non spread/tub) stick, you may need to add more flour because of the higher water content. I added about 2 more tablespoons of flour. You want it to be thick like peanut butter (says my Thursday non-baking chef). Salt and pepper it! Cook for 2 minutes until it picks up a bit of color. Now slowly add the milk and chicken broth.
  Okay, here's a neat trick to make chicken broth a bit more flavorful if you are using store bought (which you probably are). Buy the 32 ounce carton and boil it vigorously until you are left with three cups. You are reducing it and it makes for a richer product.
   Whisk your soon-to-be gravy constantly making sure you eliminate all the lumps. Bring to a boil and then reduce the heat to a simmer (barely a boil). Salt and pepper it again! Now cook it for 20 minutes. I know, long time. But it's totally worth it! This step eliminates all the flour flavor and keeps your gravy silky smooth. It will NOT gelantinize with this process. You may need to add more broth if your gravy starts to get too thick. You want it to be like a thin cake batter. Whisk every couple of minutes. Salt and pepper!  (The chef said, "you know how gravy turns to jello almost before it can even reach the table? That's wrong! But we love our mom's anyway, right?" We all laughed.)
  
Taste, taste, taste, taste, taste your gravy while it cooks. Add salt and pepper, garlic salt, whatever you like to season it but SEASON AND TASTE often.

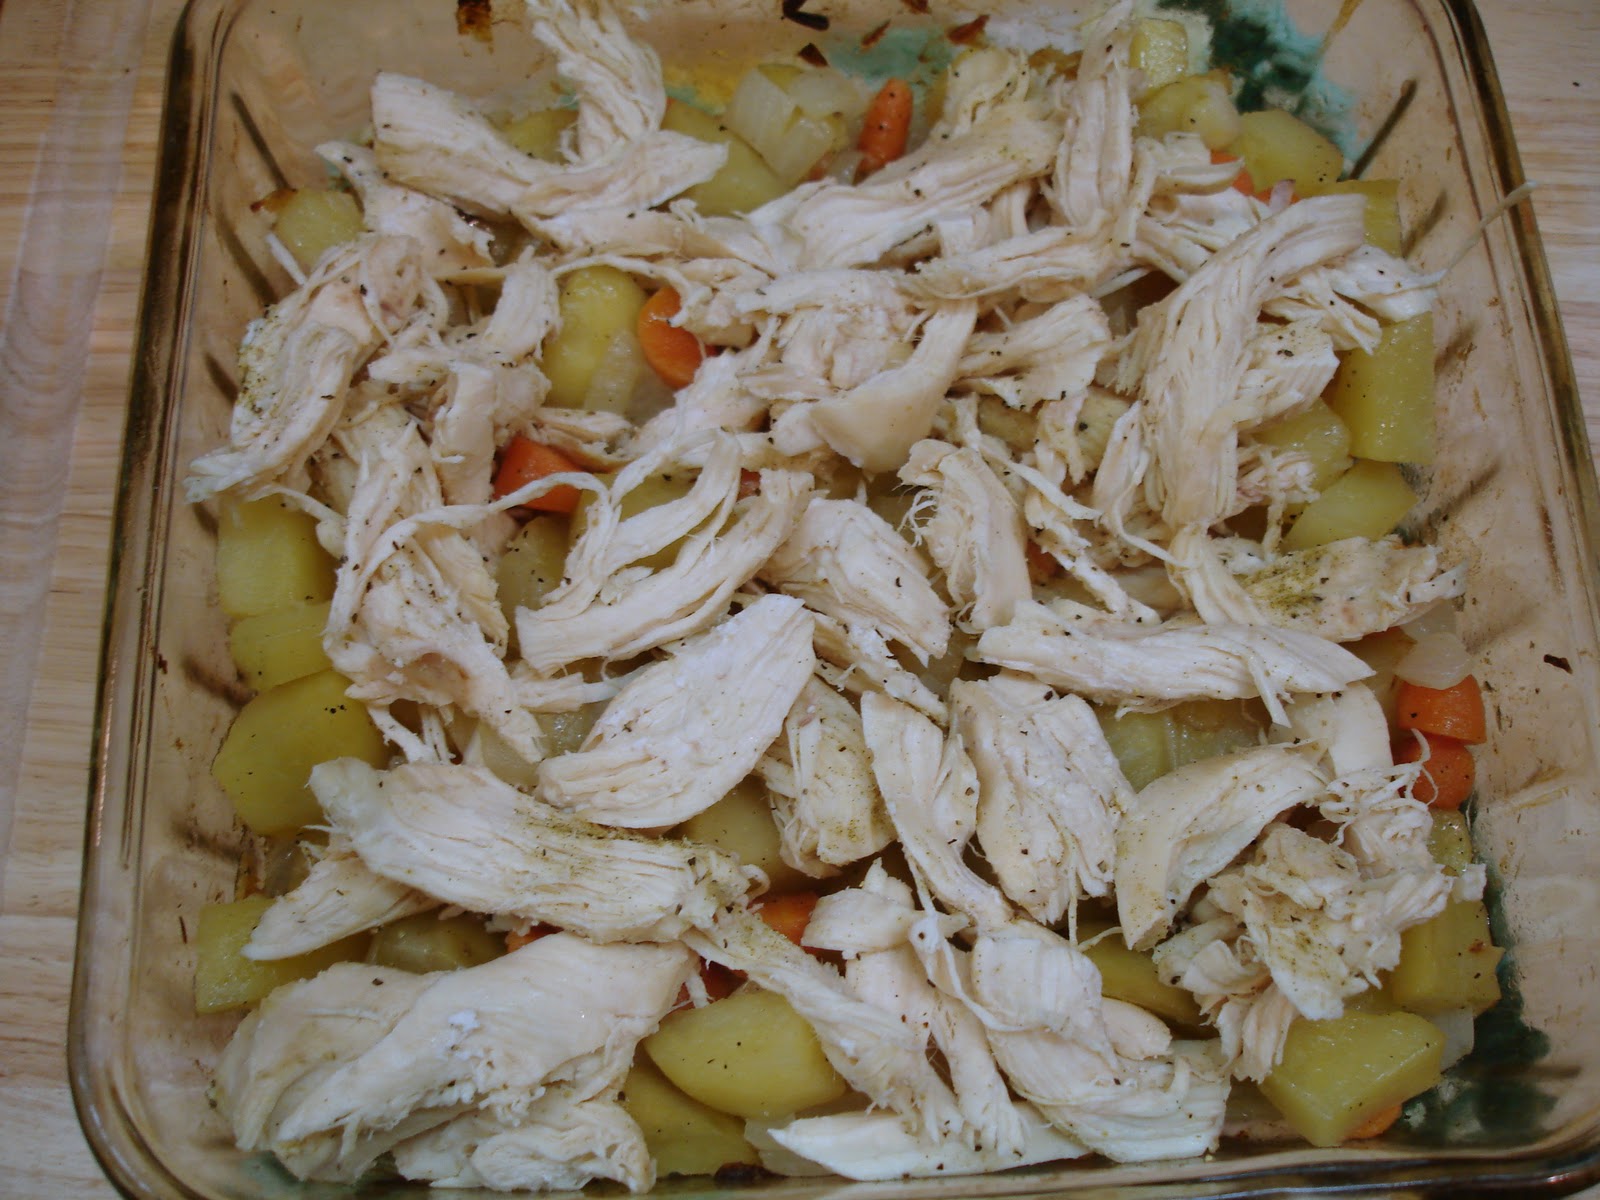
Your roasted veggies will be done by now. Take them out of the oven and spread the chicken on top of them. This is when you will add the frozen peas if you don't forget them. Which I did. 


When your gravy is done, pour it on top of your vegetables and chicken.


Oh, yum. This gravy is soooo amazing. Now it's time to add the biscuits. You can lightly roll out the dough and then place it all at once on top of the pot pie OR add the dough by drops and smooth it out over the pot pie. Doesn't matter. I dropped it on and spread it out. Then paint it with the egg wash.


 Bake for 35-40 minutes or until golden brown.


 Sooooo good. So flavorful! The amazing gravy, the roasted vegetables, the sweet potatoes and buttermilk in the biscuits!!


 You definitely don't need a side with this meal! You have chicken, vegetables, and most importantly (at least to me and the Goose) the bread. YUM doesn't do it justice.


Make this pot pie soon! Or just make the biscuits because they are divine. The sweet potato mash adds a whole layer of flavor to already delicious buttermilk biscuits.
Enjoy!!

22 June 2009

Pecan Chicken

Pecan chicken is a classic Southern dish traditionally made with bone-in, skin-on chicken. Like fried chicken, but with a pecan (pronounced pee-can in the South) crust. This recipe is a healthier version I found in one of my favorite cookbooks and then made even healthier.


You will need:

2 pie plates
9x13 baking dish
3T butter (Smart Balance)
3/4 cup lowfat buttermilk
1 egg
1 cup flour
1 cup ground pecans
1 T paprika
1/2 tsp salt
1/2 tsp pepper
6 boneless, skinless chicken breasts


Clean your chicken and cut the breasts into 3 pieces each, about the size of chicken tenders. You can leave them whole, but the smaller pieces have more coating, so more flavor, and they cook faster. Kids love anything that resembles a chicken tender.


Preheat your oven to 375 degrees. I covered my glass baking dish with foil for easy clean-up. Cut up the 3T of butter and put them in your baking dish, then place the dish into the oven while it preheats.


Mix the pecans, flour, paprika, salt, and pepper in one of the pie plates.


In the second pie plate, whisk together the buttermilk and egg. Line up your dishes starting with the buttermilk mixture, then flour, then melted butter in the baking dish.


Dredge each piece on chicken in the buttermilk mixture, coating it thoroughly.


Then evenly coat each buttermilk covered piece in the pecan mixture.


Place each piece in the dish with melted butter, then flip over so that it is buttered on each side.


Mmmmm. Buttermilk, pecans...two of my favorite words. I'm getting hungry!

Bake at 375 for 25-30 minutes. The coating will brown up nicely.


This chicken is amazing hot from the oven. I served it with some saffron rice and homemade whole wheat rolls (recipe to come). But, my favorite way to eat this chicken is cold from the fridge, cut up on a salad. Hot or cold it's super delicious and almost guilt-free. Enjoy!

26 May 2009

Whoopie Pies

Have you heard? The whoopie pie is the new cupcake. Whether or not that is true, whoopie pies are making a comeback. The story of their origin depends largely on the storyteller's heritage. Was it the Pennsylvania Dutch who carried the little pies in their lunchboxes while working the fields and would "whoop" with delight at the treat? Or did they originate in the South where cooks would make them to keep children out of the kitchen, like hush puppies created to keep dogs quiet? Anyone familiar with my blog knows which side I back. :) I scoured the internet for a cream filling that did not include shortening and found this one.


Personally, I'll take a whoopie pie over a cupcake any day and this recipe is the best I have found. In fact, it is so perfect that I will stop trying out other recipes and use it exclusively. When Tinker Bell took a bite she said, "there are no words for how good this is." I agree!! Then she said, "you're pretty good at this baking stuff." Aw, shucks.

But the best part of this recipe is that the little pies are even better the next day. They should be wrapped in plastic wrap and stored in the fridge, but allow them to come to room temperature before eating.

For the cakes:
2 cups flour
1/2 cup Dutch-process cocoa powder (it has a stronger, deeper flavor than regular cocoa)
1 1/4 tsp baking soda
1 tsp salt (I used less, about 1/2 tsp)
1 cup buttermilk
1 tsp vanilla
1 stick butter, softened (I used Smart Balance 50/50)
1 cup brown sugar
1 egg


For the filling:
1 stick butter (again, I used Smart Balance)
1 1/4 cups powdered sugar
1 cup Marshmallow Fluff
1 tsp vanilla


Combine the flour, cocoa, baking soda, and salt in a bowl and set aside. Combine buttermilk and vanilla in another, small bowl and set that aside. Beat the butter and sugar together in mixer on medium speed until fluffy, about 3 minutes. Add the egg and beat until combined.


With mixer on low, alternate adding the flour mix and buttermilk mix, beating after each addition. Begin and end with the flour mixture. Grease or line with parchment at least two cookie sheets. I used two large and one small and greased them with cooking spray--I was out of parchment paper. The original recipe calls for using a 1/4 measuring cup, but I just used a large soup spoon and got 24 cookies total, which makes a dozen whoopie pies. Using a 1/4 cup with give you 9 pies total.


They are not exactly round and perfect, are they? It won't matter when you eat them!

Bake at 325 for 13 minutes, let set on the cookie sheets for 2 minutes, then transfer to a rack to cool.


While they are cooling (and they do need to be completely cool before frosting), beat together the butter, sugar, marshmallow, and vanilla on medium speed until smooth. About 3 minutes or so.


I turned over 12 of the 24 cookies and evenly distributed the unbelievably delicious filling amongst them, then topped them with the remaining cookies.


We couldn't wait until the next day and ate, well, most of the pies right after they were made. I stacked the leftovers on a plate, covered them in plastic wrap and put them in the fridge. The next day...oh, wow. Perfection.

23 May 2009

Cast Iron Skillet Corn Bread

An old, well-seasoned cast iron skillet is a thing of beauty. My skillet belonged to my grandmother and I think about her whenever I use it.

This recipe is the only one I make anymore. I take a basic homemade cornbread recipe, sweeten it to our Southern tastes, and bake it in my skillet.


1 cup all-purpose flour
1 cup yellow self-rising cornmeal
1/4 cup sugar
1 cup buttermilk
1/4 cup oil
1/4 cup honey
2 eggs, lightly beaten
*******
3 T butter


If you don't have self-rising cornmeal then add one tablespoon of baking powder to whatever you do have.

In Florida we have honey made from bees who frequent our many, many orange groves. I use Orange Blossom honey exclusively, which is much sweeter than Clover, but for this recipe, any honey will do.


Don't have any buttermilk? You probably know the trick of adding one tablespoon of white vinegar or lemon juice to a cup of whole milk and letting it sit for five minutes, but here's another trick that I think gives you a result closer to the real thing: mix equal parts plain yogurt and milk (even skim). For this recipe you would use one half cup of plain yogurt and one half cup milk. Whisk together and there is no need to let it sit.


Preheat your oven to 400 degrees. Put three tablespoons of butter into your skillet and place it in the oven while it preheats. The butter will melt and not only grease your pan, but add an amazing crust to your cornbread.


Mix the dry ingredients together in a large bowl, make a well in the center, and add the buttermilk, oil, honey, and eggs.


Mix until just combined and pour into hot skillet. Be careful with the handle. A cast iron skillet has no protective plastic to keep you from burning your hands.


Bake for 20 minutes, but check it after 17. Overbaked cornbread is dry, which is one reason some people don't like it. Your bread should be golden and barely brown around the edges.


Store the leftovers in a plastic bag in the fridge for at least three days. It usually doesn't last that long around here!


Enjoy!

my recipe card:

Cast Iron Skillet Corn Bread

See Cast Iron Skillet Corn Bread on Key Ingredient.

20 April 2009

Paula Deen's Buttermilk Biscuits

There is nothing healthy about this biscuit, but there is no better biscuit recipe on the planet. I write that with a heavy heart because growing up my Georgia born and raised Southern grandmother lived with us and she made buttermilk biscuits every single day. And they were so good. I could cry just thinking about them. But, no matter how many times I made them with her or how many times she walked me through the process, I cannot make her recipe work for me. I don't know what it is! She just had the touch. It breaks my heart that she is not around to make them for us any more. She just used flour, baking powder, Crisco, and buttermilk and they would rise and be absolutely beautiful. When I make them they come out like pancakes. (She would cut them open while they were hot and add extra-sharp cheddar cheese slices. Mmmmmmmm.)

Paula Deen's recipe calls for yeast and the biscuits puff up and are just as tender and moist as they can be. I do, however, add one step that my grandmother never forgot and that takes these biscuits over the top. But first, the ingredients:
1 package yeast
1/2 cup lukewarm water
5 cups all-purpose flour
1 teaspoon baking soda
1/2 teaspoon salt
1 tablespoon baking powder
2 tablespoons sugar
3/4 cup Crisco
2 cups buttermilk

Mix the 1/2 cup of water to the yeast and add just a pinch of sugar, which feeds the yeast (or as Tinker Bell says, "the little burpy guys"). Set aside. Meanwhile, pour your two cups of buttermilk into a bowl to let it lose some of its refrigerated cool.


Use a pastry cutter (or two knives) to cut the shortening into the flour, baking soda, baking powder, sugar, and salt. It will start out like this:


And end up looking like this:


When your yeast has proofed (about 5 minutes), add it to the buttermilk and stir.


Add the buttermilk mixture to the flour mixture and stir until just barely combined. The longer you mix it the tougher your biscuit will be. You want tender, soft biscuits, so barely mix! Then turn it out onto a lightly floured surface and roll to your desired thickness. I like them big and fluffy, so I don't pat it out too much and am only able to cut about 7 biscuits before having to reroll. If you flatten the dough you will have flat biscuits. Then you'll think I was lying to you about how much these biscuits puff. :) I use a large cup, not a biscuit cutter.


Place your biscuits (about 12 with leftover dough) onto a greased cookie sheet. Now here is my grandmother's secret touch...rub each biscuit top with buttermilk. Instead of a flat, dull biscuit top you will have a glossy, slightly crisp top.


Paula suggests baking them at 400 degrees for 12 minutes, but my biscuits always require about 15-16 minutes. Aren't they pretty?!!


Serve them with cheddar cheese slices, butter, jam, honey, gravy, or (our family favorite) bacon, egg, and cheese.