Showing posts with label vanilla. Show all posts

26 May 2009

Whoopie Pies

Have you heard? The whoopie pie is the new cupcake. Whether or not that is true, whoopie pies are making a comeback. The story of their origin depends largely on the storyteller's heritage. Was it the Pennsylvania Dutch who carried the little pies in their lunchboxes while working the fields and would "whoop" with delight at the treat? Or did they originate in the South where cooks would make them to keep children out of the kitchen, like hush puppies created to keep dogs quiet? Anyone familiar with my blog knows which side I back. :) I scoured the internet for a cream filling that did not include shortening and found this one.


Personally, I'll take a whoopie pie over a cupcake any day and this recipe is the best I have found. In fact, it is so perfect that I will stop trying out other recipes and use it exclusively. When Tinker Bell took a bite she said, "there are no words for how good this is." I agree!! Then she said, "you're pretty good at this baking stuff." Aw, shucks.

But the best part of this recipe is that the little pies are even better the next day. They should be wrapped in plastic wrap and stored in the fridge, but allow them to come to room temperature before eating.

For the cakes:
2 cups flour
1/2 cup Dutch-process cocoa powder (it has a stronger, deeper flavor than regular cocoa)
1 1/4 tsp baking soda
1 tsp salt (I used less, about 1/2 tsp)
1 cup buttermilk
1 tsp vanilla
1 stick butter, softened (I used Smart Balance 50/50)
1 cup brown sugar
1 egg


For the filling:
1 stick butter (again, I used Smart Balance)
1 1/4 cups powdered sugar
1 cup Marshmallow Fluff
1 tsp vanilla


Combine the flour, cocoa, baking soda, and salt in a bowl and set aside. Combine buttermilk and vanilla in another, small bowl and set that aside. Beat the butter and sugar together in mixer on medium speed until fluffy, about 3 minutes. Add the egg and beat until combined.


With mixer on low, alternate adding the flour mix and buttermilk mix, beating after each addition. Begin and end with the flour mixture. Grease or line with parchment at least two cookie sheets. I used two large and one small and greased them with cooking spray--I was out of parchment paper. The original recipe calls for using a 1/4 measuring cup, but I just used a large soup spoon and got 24 cookies total, which makes a dozen whoopie pies. Using a 1/4 cup with give you 9 pies total.


They are not exactly round and perfect, are they? It won't matter when you eat them!

Bake at 325 for 13 minutes, let set on the cookie sheets for 2 minutes, then transfer to a rack to cool.


While they are cooling (and they do need to be completely cool before frosting), beat together the butter, sugar, marshmallow, and vanilla on medium speed until smooth. About 3 minutes or so.


I turned over 12 of the 24 cookies and evenly distributed the unbelievably delicious filling amongst them, then topped them with the remaining cookies.


We couldn't wait until the next day and ate, well, most of the pies right after they were made. I stacked the leftovers on a plate, covered them in plastic wrap and put them in the fridge. The next day...oh, wow. Perfection.

05 May 2009

Cooking Light Yellow Sheet Cake

I found this cake recipe on Cooking Light's website. I made a couple of changes and used Martha Stewart's frosting instead, and I made a couple of changes to that, too.


For the cake--with my changes:
1/2 cup butter (1 Smart Balance stick)
1 cup fat free plain yogurt
1 1/2 cups sugar
2 tsp vanilla
2 eggs
2 cups flour
1 tsp baking soda
1/4 tsp salt
3/4 cup low-fat buttermilk

After reading through the recipe I was unsure that it would work, but the reviews were good and that is the best indicator of how a recipe will turn out. The directions call for whisking the butter and yogurt (they used sour cream) until combined.


Then add the sugar and vanilla and beat on medium speed for 3 minutes. I used the whisk attachment on my mixer to combine the butter and yogurt, then switched to the paddle after adding the sugar.


That looks wrong, doesn't it? I saw that and thought, oh no! After the butter/sugar stage a cake mixture should be the epitome of fluffy, not grainy and so...wrong. At this point I figured my instincts were right and this cake recipe was not going to work. But instead of throwing it all away I thought, why not waste a few more ingredients and add the flour and buttermilk? :)

Add half the flour, baking soda, and salt and beat on low speed until combined. Then add the buttermilk, mix until combined. After adding the last of the flour and mixing (being careful not to overmix), the batter looks like this:


So right! It also may be the best tasting cake batter ever. Seriously delicious. I lowered their suggested temperature to 325 because I used a glass pan and baked for 35 minutes. After it was done I just left it in the pan and placed it on a raised wire rack to cool. Normally I would remove the cake from the pan, but I was just making it for our family and decided to frost it and serve from the pan.


Now the frosting...oh, my. So good. Martha calls for Valrhona cocoa, which is a fancy dutch processed cocoa. (And judging by the amazon.com reviews, overrated.) I didn't have any of that. Or any dutch processed cocoa. In fact, I was almost out of my regular Hershey's cocoa. So, I used:

1/2 cup cocoa
2 1/2 squares baking chocolate
9 1/2 T of butter (I know, weird, but I had to decrease the butter by 2 1/2 T because of the oil in the baking chocolate)
3 1/2 cups powdered sugar
1/2 cup milk
2 tsp vanilla

I melted the baking chocolate in a double boiler


and then poured that chocolate over the butter and cocoa in my mixer bowl and mixed.


I added the rest of the ingredients all at once and beat it until it was creamy. I found that I didn't need to adjust the milk or powdered sugar amounts. Leave it to Martha to get it exactly right.


The frosting was so amazing that I will probably make it the exact same way next time, even if I have a truckload of cocoa. The cake itself was wonderful. I could tell that it wasn't a full fat cake, but it certainly did not diminish the flavor. The best part was that the cake was still every bit as moist the next day. That's a rarity with cake. I will definitely make it again!

The changes I made to the cake recipe were purely for personal taste. I dislike the flavor of sour cream in cakes and plain yogurt can be substituted (with a better result, I think) in equal amounts. I used Martha's frosting because I also dislike cream cheese frostings. Too heavy for me, especially since I prefer no frosting at all. :)

30 April 2009

Banana Pancakes

We are a family of pancake junkies. Our favorite is the classic buttermilk pancake. Tinker Bell likes a few mini chocolate chips dropped on each pancake while baking, while the Goose likes blueberries. My Bubba loves to absolutely drown his pancakes, while I like mine with just a touch of syrup. But we also love banana pancakes. The great thing about this recipe is that you can substitute any type of flour you want and it doesn't change the result. One weekends I might feel indulgent and use all-purpose flour, but during the week (before school) I only use whole wheat or whole wheat pastry flours. The whole wheat helps to keep the munchkins bellies full until lunch.


1 cup flour (your choice)
1 1/2 T sugar
2 tsp baking powder
pinch of salt
1 egg, beaten
1 cup milk (any type)
2 T oil
2 ripe bananas, mashed
1 tsp vanilla
1-2 tsp cinnamon (add to your taste)

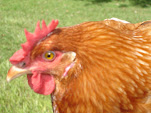
I usually use two small or medium bananas. If your bananas are particularly large, just use one or one and a half. Too much banana can make the pancake mushy and unpleasant. You want them very ripe, the darker the sweeter. I usually use a darker banana than the ones in the picture. Did you know that if you ripen a banana to just the way you like it and then stick it in the fridge it won't ripen any more for almost two weeks? The peeling will turn black immediately, but the banana itself stays perfect. Bananas ripen so quickly here in the Florida heat that this little tidbit has saved us money. (Did you know that chickens LOVE bananas? It's our girls favorite treat!)


I use my mixer to mash the bananas. I prefer the pancakes without banana lumps, but if you like them you can certainly leave big lumps and it won't hurt the finished pancake.


Add the beaten egg, milk, oil, and vanilla to the mashed bananas. This new Smart Balance oil is great stuff. A blend of canola, olive, and soy oils. (That's an Eragon egg. Such a sweet girl to help us out with our pancakes.)


This time around I used one cup of whole wheat pastry flour. It's a bit smoother than regular whole wheat. Add the flour of your choice, sugar, baking powder, salt, and cinnamon to the banana/milk mixture.


The batter will be slightly lumpy. Do not overmix! Pancakes get tough with too much mixing.


I use a 1/3 cup for each pancake. Lightly grease your griddle and bake the pancakes over medium high heat, about 350 if you have an electric griddle. When your pancakes just start to look done around the edges and the bubbles have begun to pop, flip them. (Only flip once.) After the flip I go ahead and butter them while they are still cooking. The butter melts right down into the pancake and ooooo baby!


Enjoy!

29 April 2009

Sprinkles Strawberry Cupcakes

This week's found recipe is from Martha Stewart's website. I didn't try to make this recipe any healthier, sorry. It's been my experience that cupcake recipes do not like to be messed with. I made one minor substitution and doubled the recipe, but that was it. Now let me tell you about the taste...perfection. They were fluffy with a bit of heft, not-too-sweet, moist (even the next day), and even better without the frosting. I measure the success of a cupcake by how good they are without frosting. If they need it, the recipe needs tweaking. A cupcake should be able to stand alone and then the frosting is just an extra special treat.

I pureed enough strawberries in my mini food processor to make 2/3 cup. Half of that is for the cupcake batter and half for the frosting.


Your strawberries should look like this:


To the strawberries, add 1/4 whole milk (or heavy whipping cream, which is the only change I made) and one tsp of vanilla. Set that mixture aside.


Cream 1 stick of butter (Smart Balance stick) and 1 cup of sugar until light and fluffy. That is the secret to good cakes and cupcakes. You need to beat a lot of air into the butter/sugar combo.


It is also important to add the eggs one at a time, mixing well after each addition. The recipe calls for 1 large egg and 2 large egg whites. I put the 2 discarded yolks into a baggie and add them to the scrambled eggs in the morning. In a separate bowl, combine 1 1/2 cups all-purpose flour, 1 tsp baking powder, and a pinch of salt. Add half of the flour mix to the butter, sugar, eggs mix and beat just until combined.


Then add all of your strawberry, cream, and vanilla mix.


The last step is to add the rest of the flour. Be careful not to overbeat! Just until combined.


Line a 12-cup muffin tin with paper liners, fill, and bake at 350 for 22-25 minutes. I found that 23 minutes was perfect. If you overbake your cupcakes will be dry and sad.

The frosting is amazing, if unnecessary. I ran out of powdered sugar before I could give the frosting a fluffy texture and ended up with more of a glaze. But it was a darn good glaze!

3 squares white baking chocolate
2 T heavy cream
2 cups (more!!) powdered sugar
1/3 cup strawberry puree
3 T butter, melted


I melted the chocolate in a double boiler. Really just a metal bowl over a small saucepan. The water should not get hot enough to boil and should never touch the bottom of the bowl.


Add the rest of the ingredients to chocolate and beat, adding more cream or powdered sugar, until you get the consistency that you prefer. Thick is good. :)


You've fallen in love a little bit, haven't you? I can't blame you. The little guy tastes even better than it looks!