28 July 2010

The Best Corn Muffins Ever!

I completely forgot to post last week and I apologize. In my defense I've been pretty busy.  I have a big announcement in the works, but I'm not ready to post about it yet.  First we have to celebrate birthday weekend!! Tinker Bell turns 13 on Sunday and I cannot believe my baby will be a full-fledged teenager.  My baby! And to prove to me that she is practically a grown woman she does not want a shaped cake this year. She wants a Chocolate-Raspberry Layer Cake with Chocolate Ganache from Bon Appetit magazine.  But...I'm thinking that a stormtrooper made out of fondant would make a great topper! :)  
  To make up for my lapse in posting last week I am going to share with you the recipe for the best corn muffins ever.  No, seriously, EVER.  With real corn in them!  They are perfectly sweet with amazing texture and true corn flavor.  Put down the box of Jiffy and make these muffins!
You will need:

1 stick butter
2/3 cup white sugar
1/4 cup honey (any kind)
2 eggs
1/2 tsp salt
1 1/2 cups all-purpose flour
3/4 cup cornmeal
1/2 tsp baking powder
1/2 cup buttermilk
3/4 cup frozen corn (thawed)


Preheat your oven to 380 degrees (You'll increase it to 400 after we put the muffins in the oven. The increase in temperature gives the muffins a nice, puffy top.)  Line a 12-cup muffin pan with papers.

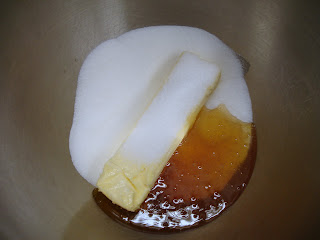
Cream together the butter, sugar, and honey in a large bowl.  I used my KitchenAid with paddle attachment.


Then add the eggs and mix together.


Now add the flour and mix until barely combined.


And now the cornmeal.  Don't overmix.


Now fold in the buttermilk and corn.  I switch to a spatula to make sure I don't overmix.  (About the corn...you can use canned, just make sure it is low-sodium and completely drained and dry.  If you use frozen, let it sit in a bowl of hot water for about 2 minutes and it will thaw completely.  Then make sure you get it really dry.)


You'll get 12 muffins if you don't overfill the cups.  I use a 1/4 measuring cup to scoop up the batter.  The muffin cups will end up about 2/3 full.


Place the muffins in the oven and increase the temp to 400.  Bake for 18-25 minutes.  I took them out at 18 and they were perfect.  Moist, but baked completely. Stick a toothpick in the middle muffin to check for doneness. There is nothing worse than a dry corn muffin! Better to underbake just a bit than overbake.  Let them sit in the pan for 5 minutes.  (Remember that they will continue to cook up a little after you take them out.)


Aren't they beautiful?!!


Perfect little, happy muffins!  And the taste...wow.  They will knock your socks off!!!!


Look at that corn!  It really adds another dimension of texture and flavor to the muffins.


They really do not need butter, but...


butter makes everything better.  You definitely don't need to put honey on these corn muffins.  The honey flavor shines.  So, am I forgiven for not posting?  :)

Enjoy!!!!

The Best Corn Muffins Ever

1 stick butter
2/3 cup white sugar
1/4 cup honey (any kind)
2 eggs
1/2 tsp salt
1 1/2 cups all-purpose flour
3/4 cup cornmeal
1/2 tsp baking powder
1/2 cup buttermilk
3/4 cup frozen corn (thawed)

1. Preheat your oven to 380 degrees 
(You'll increase it to 400 after we put the muffins in the oven. 
The increase in temperature gives the muffins a nice, puffy top.)  
Line a 12-cup muffin pan with papers.

2. Cream together the butter, sugar, and honey in a large bowl.  
I used my KitchenAid with paddle attachment.

3. Then add the eggs and mix together.
4. Now add the flour and mix until barely combined.
5. And now the cornmeal.  Don't overmix.
6.Now fold in the buttermilk and corn.  
I switch to a spatula to make sure I don't overmix.

7. Fill your muffins cups with the batter.
8. Place the muffins in the oven and increase the temp to 400. 
Bake for 18-25 minutes.

14 July 2010

Slow Cooker Apple Crisp

I made my apple pie over the 4th of July weekend, but still had a whole bunch of apples left.  I spent most of the day running around in the Heat (it earned the capital H, trust me) and wanted to make an apple dessert without turning on my oven.  We had macaroni stew for dinner, but that was on the stove so the Crock Pot was empty and ready to make something sweet.  I decided on apple crisp, which made Bubba panic for a minute because, "the whole point of a crisp is that it's crisp!"  He was convinced that it would turn out soggy and didn't believe me when I said it would be awesome.  But he should realize after 17 years of marriage that I am never wrong.

You will need:

a slow cooker
6 Granny Smith apples
1/3 cup white sugar
1 T cornstarch
1 tsp ground cinnamon
*****************
1 cup flour
3/4 cup old-fashioned oats
1/2 cup brown sugar
1/2 cup white sugar
2 tsp cinnamon
1 stick butter (Smart Balance)
1 cup chopped walnuts (optional--I didn't use them this time)


I used Granny Smith apples because they are tart and, I think, the perfect cooking apple.  There is a lot of sugar in this recipe and if you start with a sweet apple you may end up overwhelmed by sweetness.  Plus the tartness of the Granny Smiths really adds a nice balance to this dessert.  Peel and chop all of your apples and add them to the slow cooker.  I did not grease the pot first--it's unnecessary.  Now, the apples are going to brown up a bit while they cook, so I never worry about adding lemon to the apples to protect them from the air.  But if you think making the topping will take you a while and brown apples freak you out, then go ahead and toss the apples with 2 T of lemon juice. 


In a medium size bowl, whisk together the 1/3 cup sugar, cornstarch, and cinnamon.  Pour the mixture over your apples and toss.


In the same, now empty, bowl, mix together the flour, oats, 1/2 cup white sugar, 1/2 cup brown sugar, and cinnamon.  Then add the stick of butter.


Thoroughly work the butter into the flour mixture with a fork or your fingers and pour it over the top of the apples.


Place two paper towels across the top of the slow cooker and put on the lid. 


Cook on low for 3 hours or high for 1.5 hours.  Then remove the top, take the pot out of the cooker and set it on a heat-safe surface.  Allow it to cool for at least 30 minutes.  The topping will harden up a bit more and you won't burn your mouth when you finally dig in.  :)


The topping is crisp and the apples are tender.  SO delicious!  If you cook it longer than you should the apples will cook down into applesauce, but that's just fine.  It will taste great anyway! 


We all loved this apple crisp!  And you will, too.  Enjoy!!


Sunshine Mom's Slow Cooker Apple Crisp

slow cooker
6 Granny Smith apples 
1/3 cup white sugar
1 T cornstarch
1 tsp ground cinnamon
*****************
1 cup flour
3/4 cup old-fashioned oats
1/2 cup brown sugar
1/2 cup white sugar
2 tsp cinnamon
1 stick butter (Smart Balance)
1 cup chopped walnuts (optional--I didn't use them this time)

1. Peel and chop all of your apples and add them to the slow cooker.
2.In a medium size bowl, whisk together the 1/3 cup sugar, cornstarch, and cinnamon.  
3. Pour the mixture over your apples and toss.
4. In the same, now empty, bowl, mix together the flour, oats, white sugar, brown sugar, and cinnamon.
5. Then add the stick of butter.
6. Thoroughly work the butter into the flour mixture.
7. Pour it over the top of the apples.
8. Place two paper towels across the top of the slow cooker and put on the lid. 
9. Cook on low for 3 hours or high for 1.5 hours.
10. Allow it to cool for at least 30 minutes.


08 July 2010

Peach Ice Cream

I look forward to taking out my ice cream maker every summer.  It's small and has zero frills, no salt, just a paddle, a small motor, and a glorified ice pack as a bowl.  I keep the bowl wrapped in plastic bags in our chest freezer all year long, so it is always ready to make ice cream.  It makes the best ice cream from chilled custard and only takes a few minutes to churn it into smooth, soft serve ice cream.  If I want it more like store bought, I just place the bowl with the soft ice cream into our freezer for a few hours.  And there really isn't any ice cream better than homemade.  I've been making it a lot the past couple of weeks!  The best chocolate ice cream is from joyofbaking.com.  It's thick, rich, super chocolaty, and tastes a lot like gelato.  YUMMY.  But my favorite homemade ice cream is peach.  So delicate.  It's not very sweet, so the peach and vanilla really shines through. It's so amazing right out of the ice cream maker, but the flavors mature in the freezer overnight and it's even better the next day. 

You will need:

ice cream maker
1 cup milk (I use skim, but whole is better!)
1/8 tsp salt
1 egg, beaten
1 1/4 cups heavy cream (no substitutions on this one)
1/2 cup pureed peaches (more on this later)
3/4 tsp vanilla
1/4 tsp almond extract


This recipe for peach ice cream makes about 6 servings.  I have this ice cream maker, but I found it at our local Wally Mart for $20 about four summers ago. I've never had even one issue with it and, although I may covet this ice cream maker, my little guy is just perfect for our family of four.  Everyone has a serving of fresh churned ice cream for dessert and there are two servings leftover for Mama to eat alone while watching General Hospital the next day.  :)

I've found that the best homemade ice cream starts with a custard.  Don't be intimidated!  Custard is easy to make.  It just requires a little bit of patience and a bit of stirring.    About the peaches...you can use fresh, frozen, or canned.  If you use canned, drain them first.  You'll end up with a bit more than 1/2 cup of puree, but throw it all in.  You'll be tempted, when using frozen or fresh, to leave nice, big, yummy-looking chunks of peach.  Don't.  When it freezes the chunks will be too hard to eat.  You don't have to get the peaches completely smooth, of course, but just make sure all your pieces are smaller than half a green pea. 

In a heavy-bottomed saucepan, heat the milk (but not the cream) over medium low heat until hot and just starting to froth.  Do not let it boil.  Then stir in the salt and sugar until dissolved.


Pour 1/4 of the hot milk mixture into the beaten egg to temper the egg.  You don't want pieces of scrambled, cooked egg in your ice cream! 


Mix constantly and then add the egg mixture to the rest of the milk and continue to mix constantly. 


Continue to cook and stir (constantly) for 10-12 minutes over medium low heat or until the mixture coats the back of a metal spoon without dripping off. 


Pour the custard into a metal bowl and chill for at least 2 hours or overnight.  It needs to be really cold.


In a bowl or large measuring cup, combine the heavy cream, peaches, vanilla, and almond extract. 


Add to the custard and mix thoroughly.


Then pour into your ice cream machine.  Follow the directions for your machine.  Mine calls for attaching the paddle, securing the top, and turning to on.  That's it.


Now you wait for this to happen...


It doesn't take very long.  Maybe 20 minutes.  My machine says to listen for the motor to stop spinning the paddle and turn off.  We all stand around the kitchen waiting and rubbing our hands together in gleeful anticipation.  No chance of the motor stopping and burning itself up!  When I lift off the top the paddle comes with it and I always think, I should just stand over the sink and link that clean.  But I beat down my inner-Gollum and don't run off with my precious.  Because I love my family and want to share with them.  :)


Serve immediately or wait, if you can.  Right out of the machine the peach ice cream is soft, creamy, fluffy, and light.  Unbelievably delicious!


Dessert dish courtesy of my buddy PMP.  Thank you, chica!!  The ice cream looks beautiful in it's special dish.


Again, freeze it for a few hours if you prefer a thicker, hardier ice cream texture.  But just look how extraordinary it looks straight from the machine.  I could swim in it!


The picture of summertime. Enjoy!!

01 July 2010

Old Glory Pie

In honor of Independence Day, I finally turned on my oven!  I thought I would do something a little different this 4th of July.  Normally I bake the best apple pie ever (it truly, truly is) or my flag cake.  This year, I combined the two...sort of...and made a flag pie with blueberries and red cherries. 
  My favorite thing about this time of year isn't the summer heat (seriously, it's not the heat), the fireworks, the long weekend, the homemade ice cream, or the fresh corn, but the beautiful, endless bounty of fresh berries. (And before you even think it, I know that cherries are not a berry.  In fact, Bubba, Tink, and I just had a long discussion about how much a cherry is not a berry. One of us even resorted to googling "is a cherry a berry," but I won't say who.) So, stock up on all the berries in your local farmer's market or grocery store and toss any berries that don't get eaten into a freezer bag and they will keep until next year.  These blueberries came from a farm less than an hour from our house!


You will need:

5 cups dark cherries (fresh or frozen)
1 1/2 cups blueberries (fresh or frozen)
3 T lemon juice
1 cup sugar
1/4 cup cornstarch
1 heaping T instant tapioca pearls (1T plus 1/4 cup if using frozen cherries)
1T butter, cut into pieces
two pie crusts


Preheat your oven to 375 degrees.

Wash and pit your cherries (or open up three bags of frozen) and put them in a large bowl.  Wash and check your blueberries for stems and place them in a smaller bowl.  Toss the cherries with 2T of the lemon juice, the blueberries with the remaining 1T of juice.  Mix together the sugar and the cornstarch.  Add 1 cup of the mixture to the cherries and stir gently.


Then add the remaining 1/4 cup of mixture to the blueberries.


If you are using fresh berries, get a heaping T of tapioca and sprinkle the pearls onto the blueberries until you are left with a real tablespoon.  Sprinkle the remainder onto the cherries.  Stir.  If you are using frozen berries, add 1T of tapioca pearls to the blueberries and 1/4 cup pearls to the cherries.  Either way, let the mixtures sit for 15 minutes. 

While the berries and cherries are hanging out (or as the kids would say, chillin' out, maxin', relaxin', all cool) place one pie crust into your pie pan and set the other out on a floured countertop or pastry cloth.  Cut off the bottom of one side so that you have a nice, long, evenly flat side.  Then, using a pizza cutter, cut three long, even pieces for the 3 long stripes.  (You will eventually end up with 3 long stripes, 3 short stripes, and 6 stars.)


Set those aside and cut one more.  Now cut that one into thirds.


If you have a mini star cookie cutter, good for you!  If you had one but lost it (like me) or have never had one you can freehand the stars or use a template.  I used a cupcake decoration.  You need 6 stars.


Now you have your stars and stripes!

Bend a bit of aluminum foil to create a dam for the blueberries in the upper left-hand quadrant of your pie dish. 


Pour your blueberries into your dam, then pour the cherries into the remaining 3/4 of the pie.  Slowly remove the foil.


Place the butter pieces around the pie.


Now add your stars and stripes!  Stars over the blueberries, of course.  :)


Tuck the edges of the stripes into the bottom pie crust.


Bake at 375 for 40-60 minutes.  The sauce will thicken up quite a bit while it bakes.


Don't run to the dry cleaners and the library while the pie is in the oven because it may only need 40 minutes and 60 minutes will make the top crust kind of brown.  But even if you do run errands, the pie is going to taste AWESOME.


My favorite thing about this pie is that the berries (and cherries) really shine.  Their natural sweetness is enhanced by the mere 1 cup of sugar and not overwhelmed.  Have you ever had one of those cherry pies that taste like pure, gooey sugar?  Ick.  This pie is all about the berries.  And cherries, which are not a berry dang it! :) 


You can taste the perfectly ripe blueberries and the tang of the fresh cherries.  This pie is a showcase for berries!  And cherries!! 


I hope you enjoy it every bit as much as we did.  I doubt there will be any left for us for the actual 4th of July.  Guess I'll have to make another one!!

Happy 4th of July!!!!!!!!!!!!